Getting Started with Subscord
This guide will walk you through the process of setting up Subscord for your Discord server
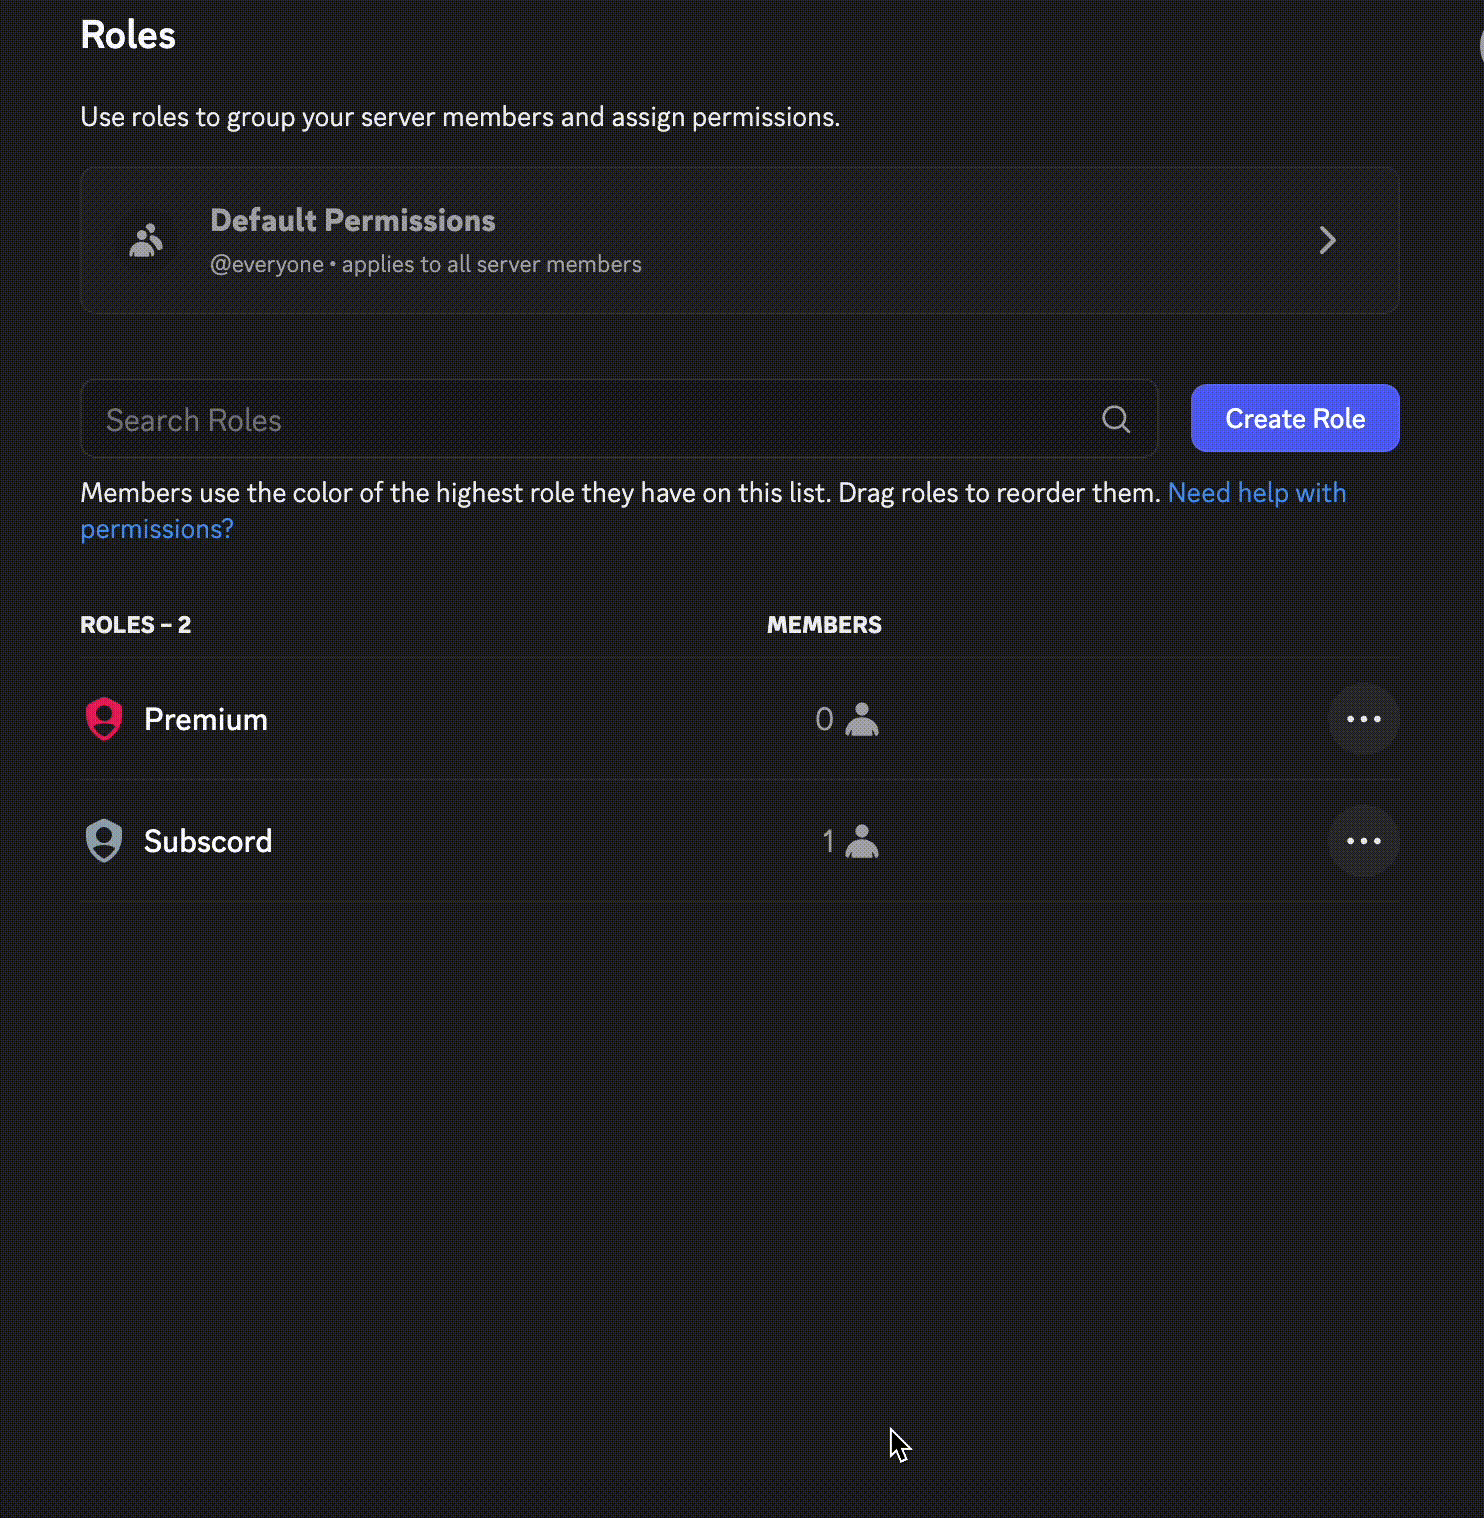
Discord Server Setup
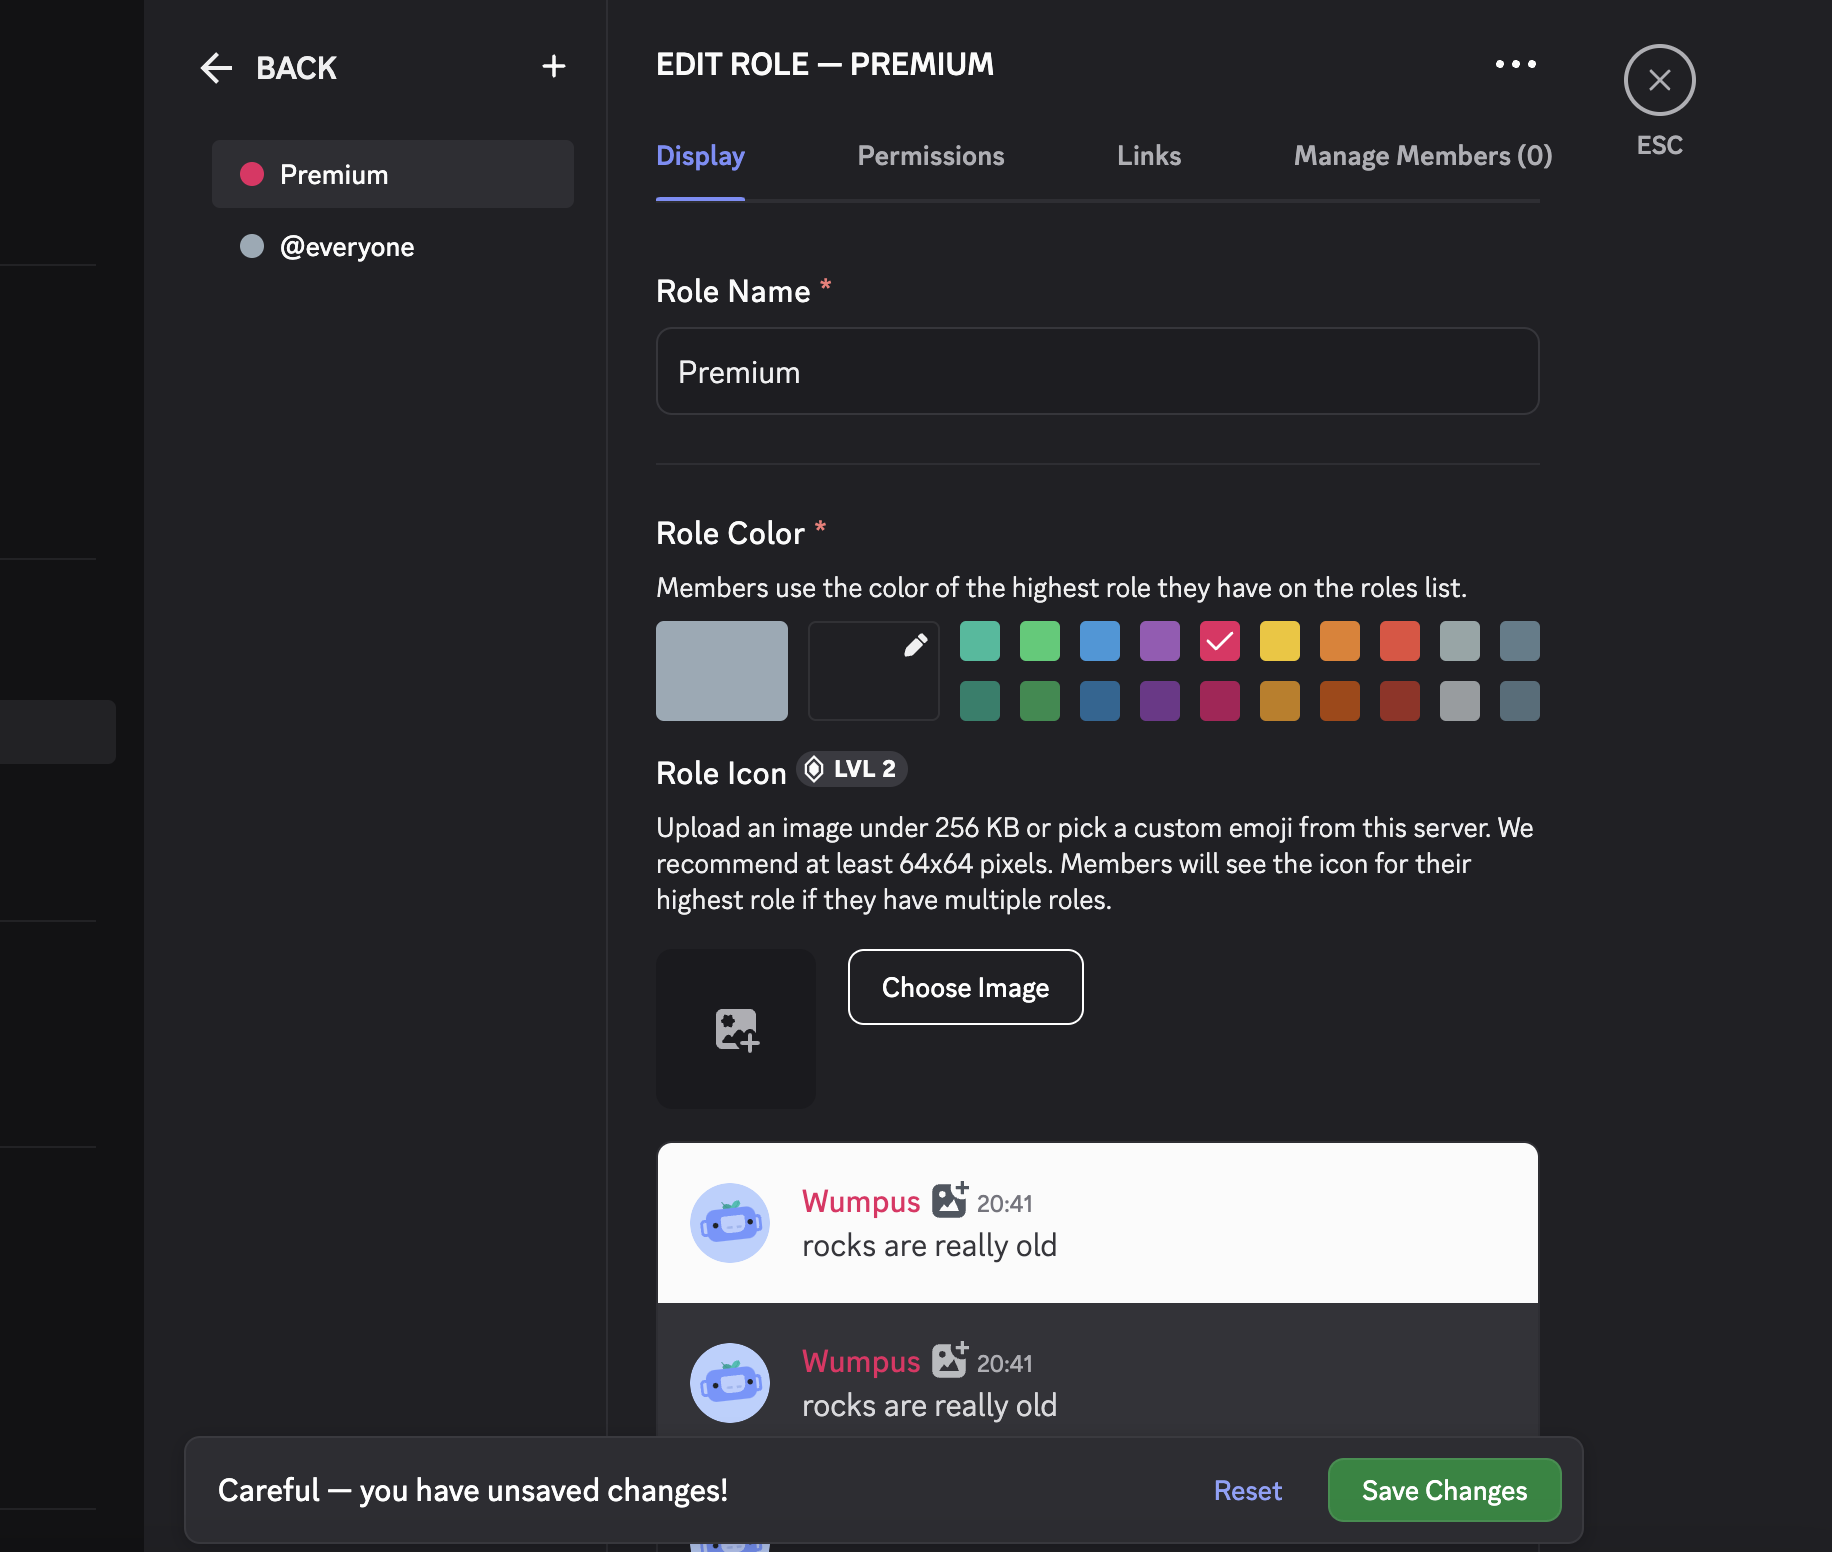
First, you need to create a new role in your Discord server that Subscord will manage. Let's call it "Premium" for this example.
- Go to your Server Settings > Roles.
- Click 'Create Role'.
- Name the role (e.g., "Premium").
- Configure the permissions for this role as needed.
- Save Changes.
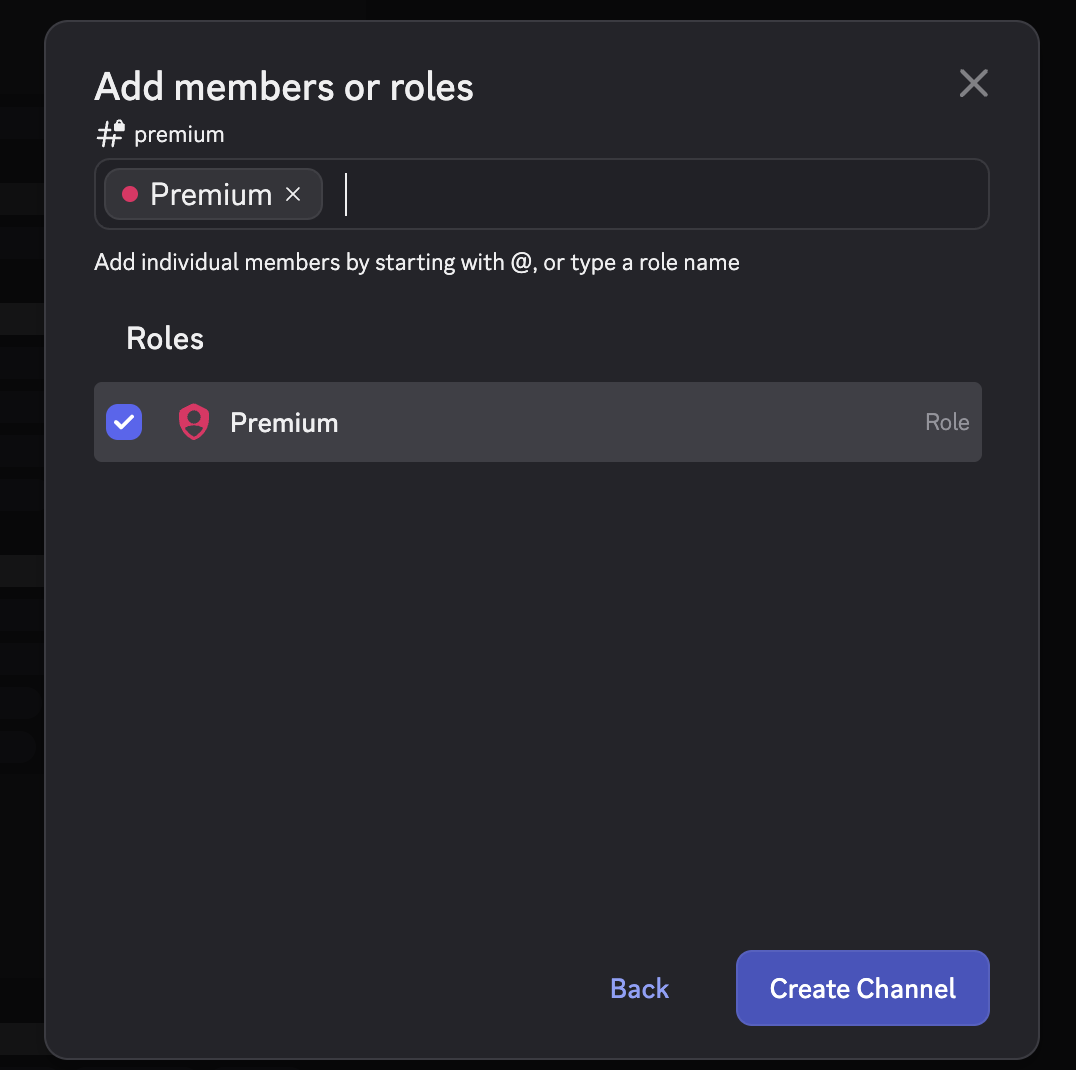
Next, create a channel that only users with the "Premium" role can access.
- Create a new channel (text or voice).
- Name the channel (e.g., "#premium-chat").
- Make it a Private Channel.
- In the 'Who Can Access This Channel?' step, add the "Premium" role you just created.
- Click 'Create Channel'.
Now you have a role that Subscord can assign to paying members and a channel restricted to those members.
Subscord Sign Up
Now let's connect your server to Subscord.
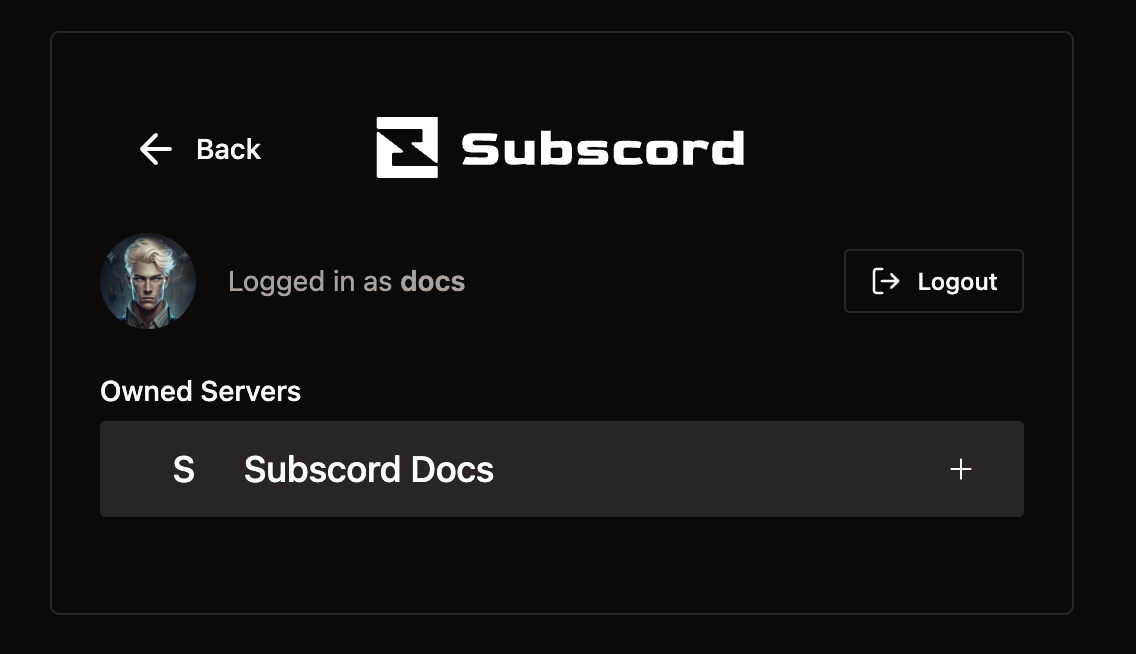
- Go to the Subscord Dashboard (opens in a new tab).
- Click on the server you want to invite the Subscord bot to.
- Click Continue.
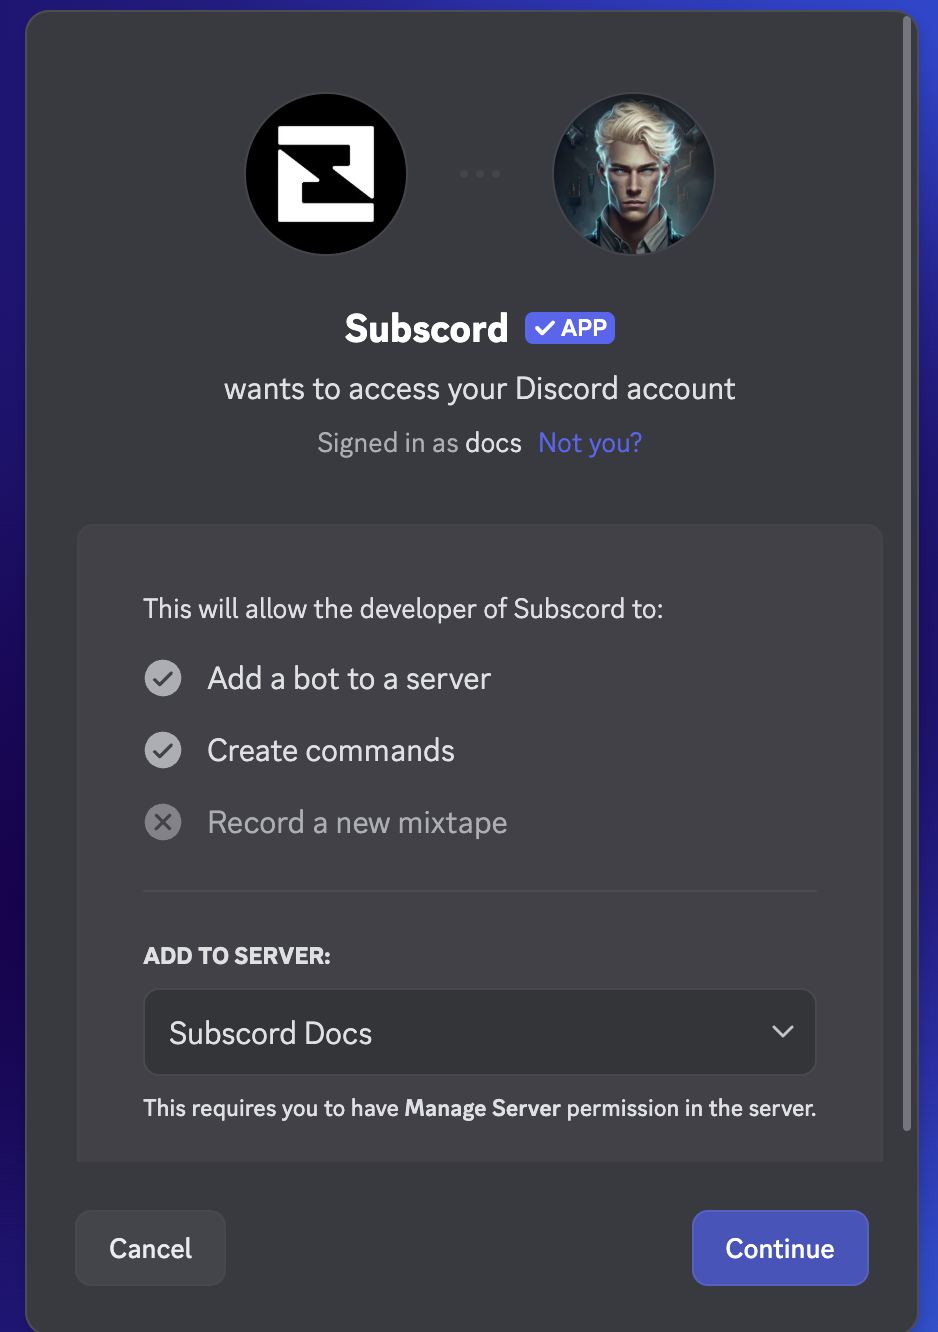
- Click Authorize.
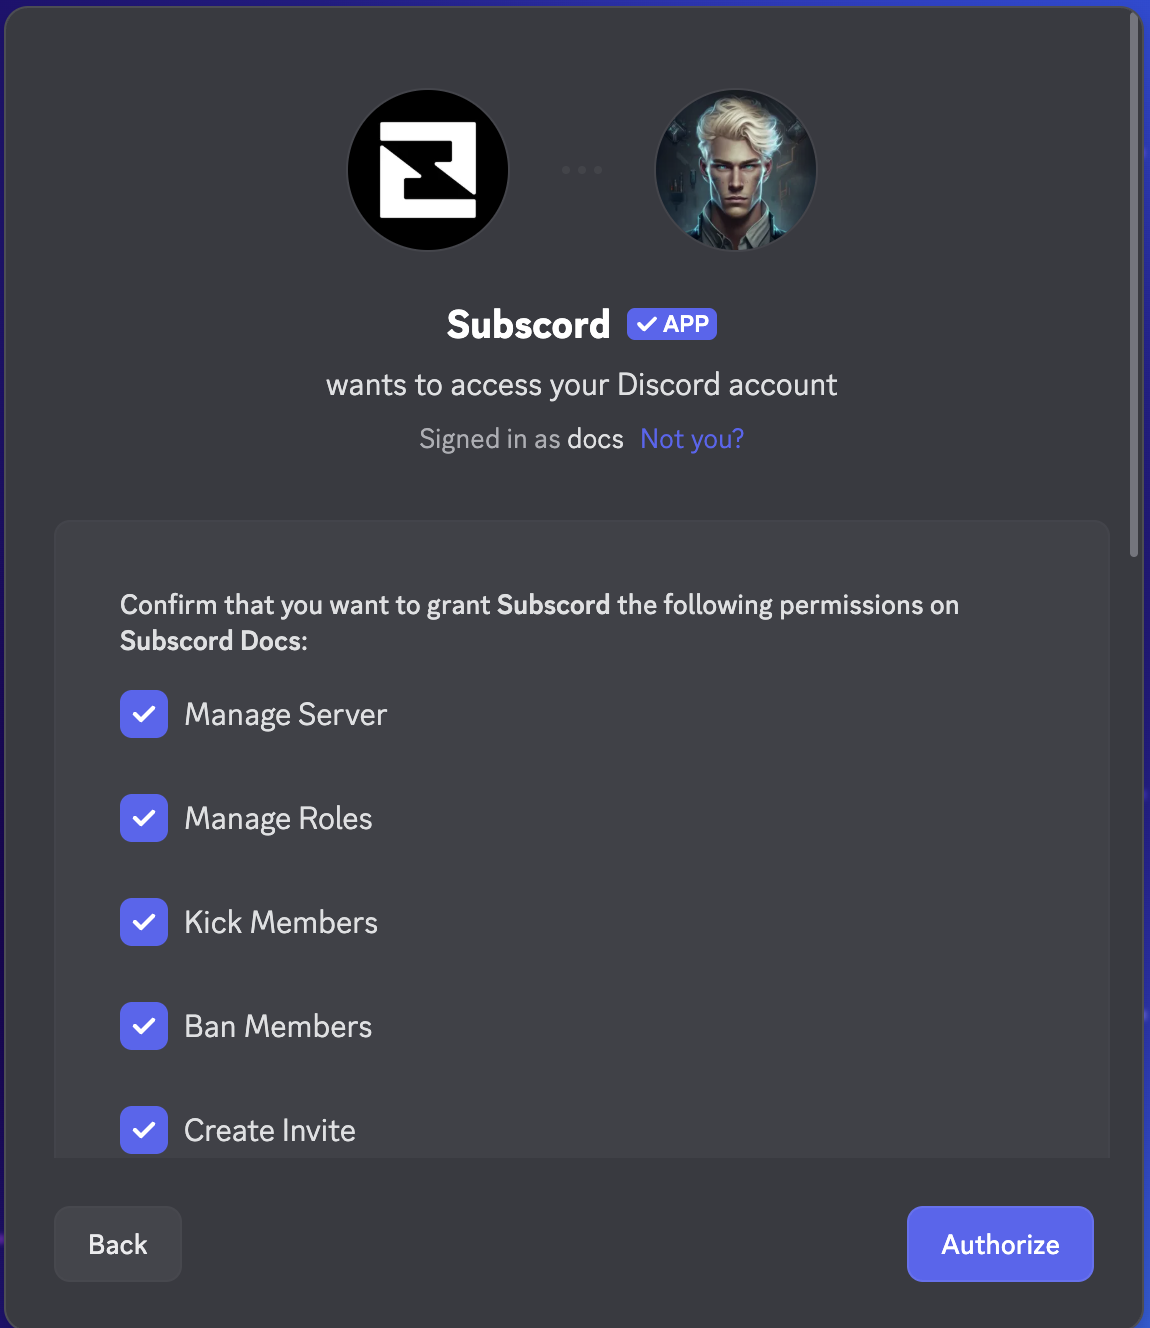
Subscord bot should now be added to your server and you'll be redirected to the Subscord dashboard.
Payment Method Setup
Next, configure how you want to receive payments.
-
Navigate to the Settings page in your Subscord Dashboard.
-
Go to the Payment Methods section.
-
Choose your preferred payment method:
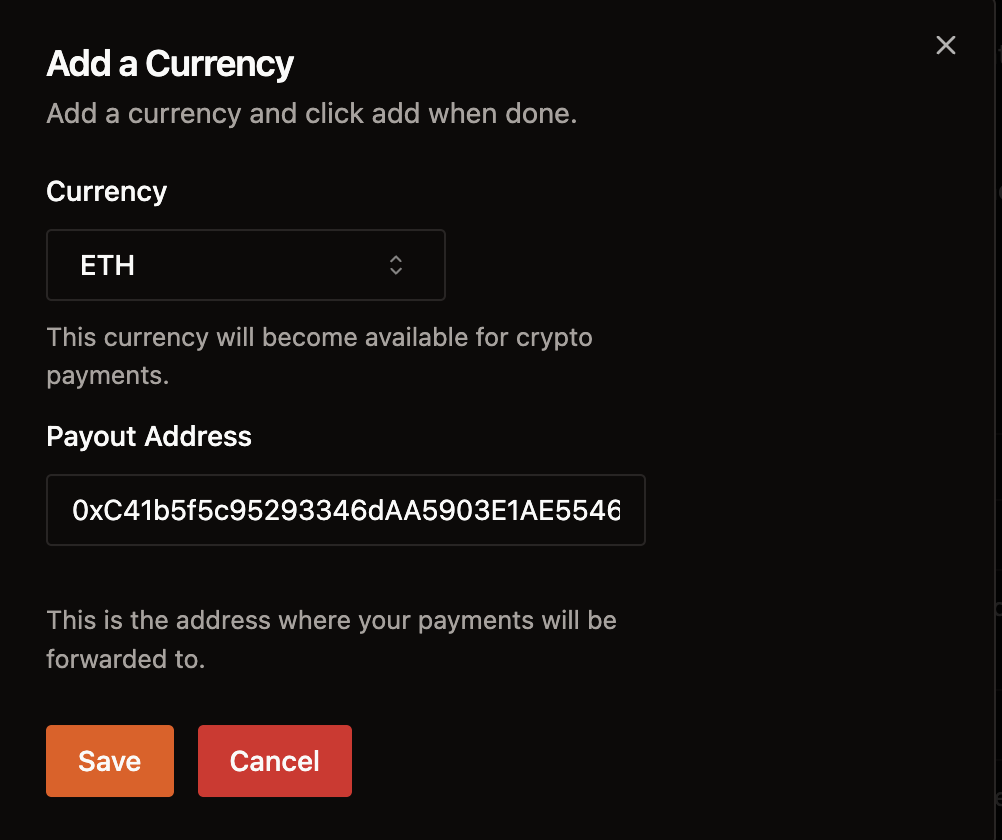
Option A: Cryptocurrency Wallet
- Click 'Add Wallet'.
- Choose the cryptocurrency you want to receive (e.g., ETH, USDC, SOL).
- Paste your wallet address for the selected cryptocurrency.
- Save the changes.
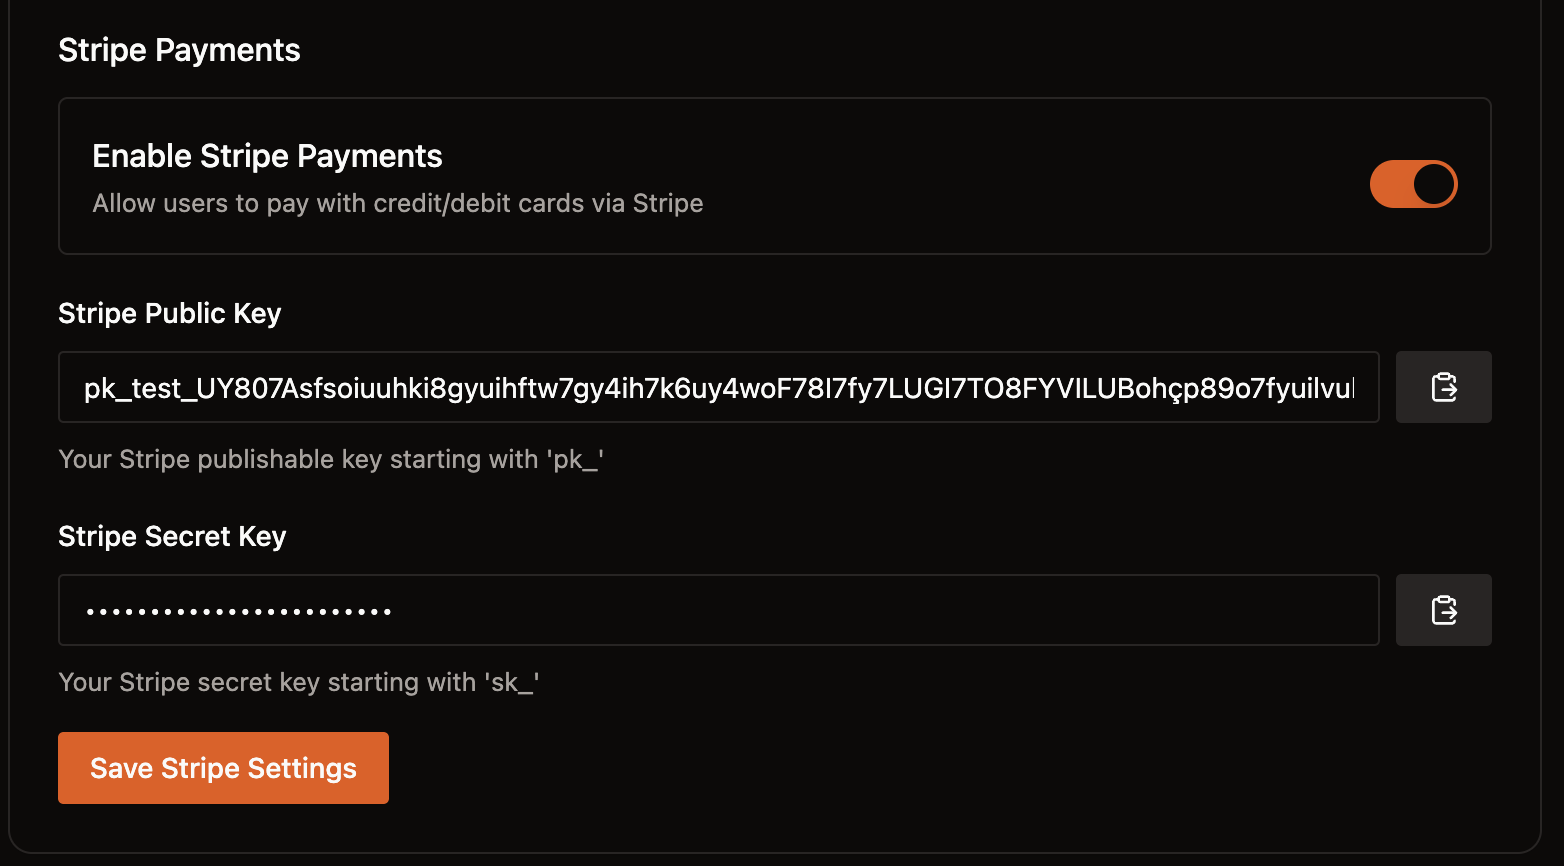
Option B: Stripe
- Find your Stripe API keys in your Stripe Dashboard (opens in a new tab).
- Paste the public and secret keys into the respective fields in Subscord.
- Make sure the "Enable Stripe Payments" switch is turned on.
- Save the changes.
You have now configured how you will receive payments for your Subscord products.
Creating a Product
With your server connected and payment methods set up, it's time to create your first product!
-
Go to the Products page in your Subscord Dashboard.
-
Click the Add Product button.

-
Fill in the product details:
- Name: A clear name for your product (e.g., "Premium Membership", "Exclusive Content Access").
- Description (Optional): Provide more details about what the product offers.
- Product Image (Optional): Upload an image to represent your product.
-
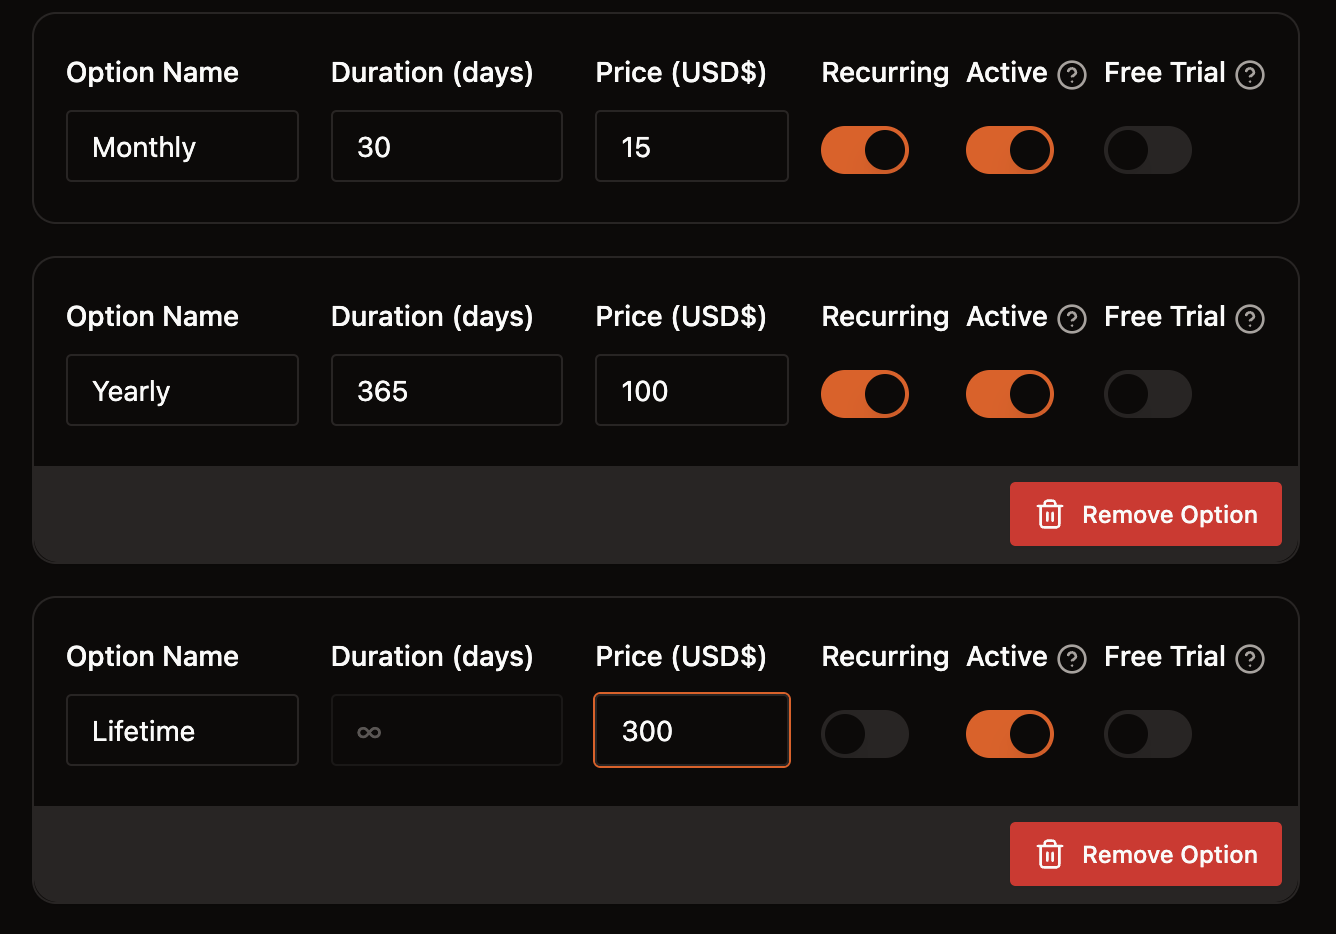
Configure Product Options. You can add multiple options (e.g., different durations):
- Click Add Option.
- Option Name: (e.g., "Monthly", "Yearly", "Lifetime Access").
- Pricing & Duration:
- Currency: Select the currency for this option (e.g., USD, EUR, GBP).
- For Subscriptions: Set the Price and the Duration in days (e.g., Price: 10, Duration: 30 for monthly).
- For One-Off Payments: Set only the Price.
- For Free Trials: Set the Duration of the trial period (Price is typically $0).
- Example: You could add one option named "Monthly" for $10 USD with 30 days duration, and another named "Yearly" for €100 EUR with 365 days duration.
-
Important - Configure Role Hierarchy in Discord:
- Go back to your Discord Server Settings > Roles.
- Find the Subscord bot role.
- Drag the Subscord role UP in the list so it is positioned ABOVE the roles you want it to manage (e.g., above the "Premium" role).
- This is essential! If the Subscord bot role is not higher than the roles it needs to assign, it won't have the necessary permissions.
- Save Changes in Discord.
-
Select the Discord Roles to Grant:
- Choose the role(s) from the dropdown list that users should receive when they purchase this product (e.g., the "Premium" role you created earlier).

-
Save the product in the Subscord dashboard.
Your product is now created! Next, you'll set up your store page.
Store Page Setup
The final step is to customize your public store page where users can purchase your products.
-
Navigate to the Store section in your dashboard.
-
Configure the following details:
-
Store Name:
- Enter the desired name for your store.
- This name will appear prominently on your store page and will be used for the page title, metadata, and social media link previews (embeds).
- Example: "My Awesome Community Store"
-
Store Description:
- Write a brief description of your store or community.
- This description will be used as the meta description for search engines and may also appear in social media link previews.
- Example: "Get exclusive access to premium content and perks for our community."
-
Store Banner:
- Click the upload button or area for the banner.
- Choose a wide image file (like a landscape photo or a custom graphic) to upload.
- This image will be displayed as a banner across the top of your store page.
- Recommended dimensions: 1500x400 pixels

-
-
Save the changes.
Your store page is now set up! You can find the public link to your store on this page or the main dashboard and start sharing it with your community.
Here's the final result:
